基于Hexo搭建个人网页(简中简,完善中...)
简要记录了基于Hexo搭建本站的过程。
0.系统环境
- 开发系统:Windows 10 Professional x64
- 测试浏览器:Edge 138.0.3351.77 (正式版本) (64 位)及140.0.3421.0 (正式版本) dev (64 位)
*后续软件安装均为windows x64版本 - hexo配置文件分两类:站点(全局)配置、主题配置
- hexo中的网页分为两种page、post,page是页面,post是文章,page和post都放在source文件夹下,但page在source下,post在source/_post下
- hexo也可以自定义页面,参考自定义页面
- 也可以在默认page上修改某一页面的index.md,来修改页面的布局
- md文件支持原生markdown、css、html等语法
- hexo自带tags(根据标签分类的页面)、categories(根据类别分类的页面)、about(关于)、link(友情链接)、archives(根据时间线排序)等page,可通过修改_config.yml中menu配置项来添加或删除
- hexo新建
1. 下载node.js和git
2. 安装hexo
创建hexo_blog_main文件夹,进入文件夹,右键选择Git Bash Here,输入以下命令:
1 | npm install -g hexo-cli ##安装,后续新建hexo blog不需重新下载,跳过该命令 |
初始化成功后在当前路径会新建如下文件/文件夹:
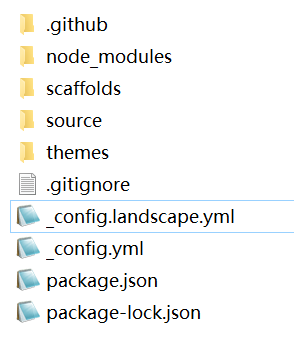
其中,_config.landscape.yml是默认主题(landscape)的配置文件,主题在_config.yml中设置,但需提前下载(见下一步),_config.yml是hexo的配置文件,hexo博客的配置都在这个文件中,包括主题、插件、插件配置等;themes文件夹下放置主题文件夹;source文件夹下放置全局配置、资源,如博客文章/_post/*.md结尾、本地图片/img/*、配置/css/mystyle.css、/js/star-canvas.js、字体/fonts/*.ttf、页面/introduction/index.md、html等、插件/live2d*;
3. 安装butterfly主题及插件
直接下载butterfly仓库zip或者git克隆
1 | git clone -b master https://gitee.com/immyw/hexo-theme-butterfly.git themes/butterfly |
下载live2d-widget、live2d-api、xiaomai模型
新版live2d-widget的autoload.js、*.css被放在了dist文件夹中,修改路径时需加上/dist/。
4. 配置github pages
在github上创建一个仓库,仓库名为linphone-young.github.io
网站配置文件_config.yml中添加:
1 | deploy: |
hexo三连: hexo clean; hexo g; hexo d;
访问https://linphone-young.github.io/
hexo g 会生成/public文件夹,hexo d会将public文件夹中的内容推送到github仓库,github仓库中的内容即为网站内容
5. 推送到搜索引擎
本博客所有文章除特别声明外,均采用 CC BY-NC-SA 4.0 许可协议。转载请注明来源 星星点灯!